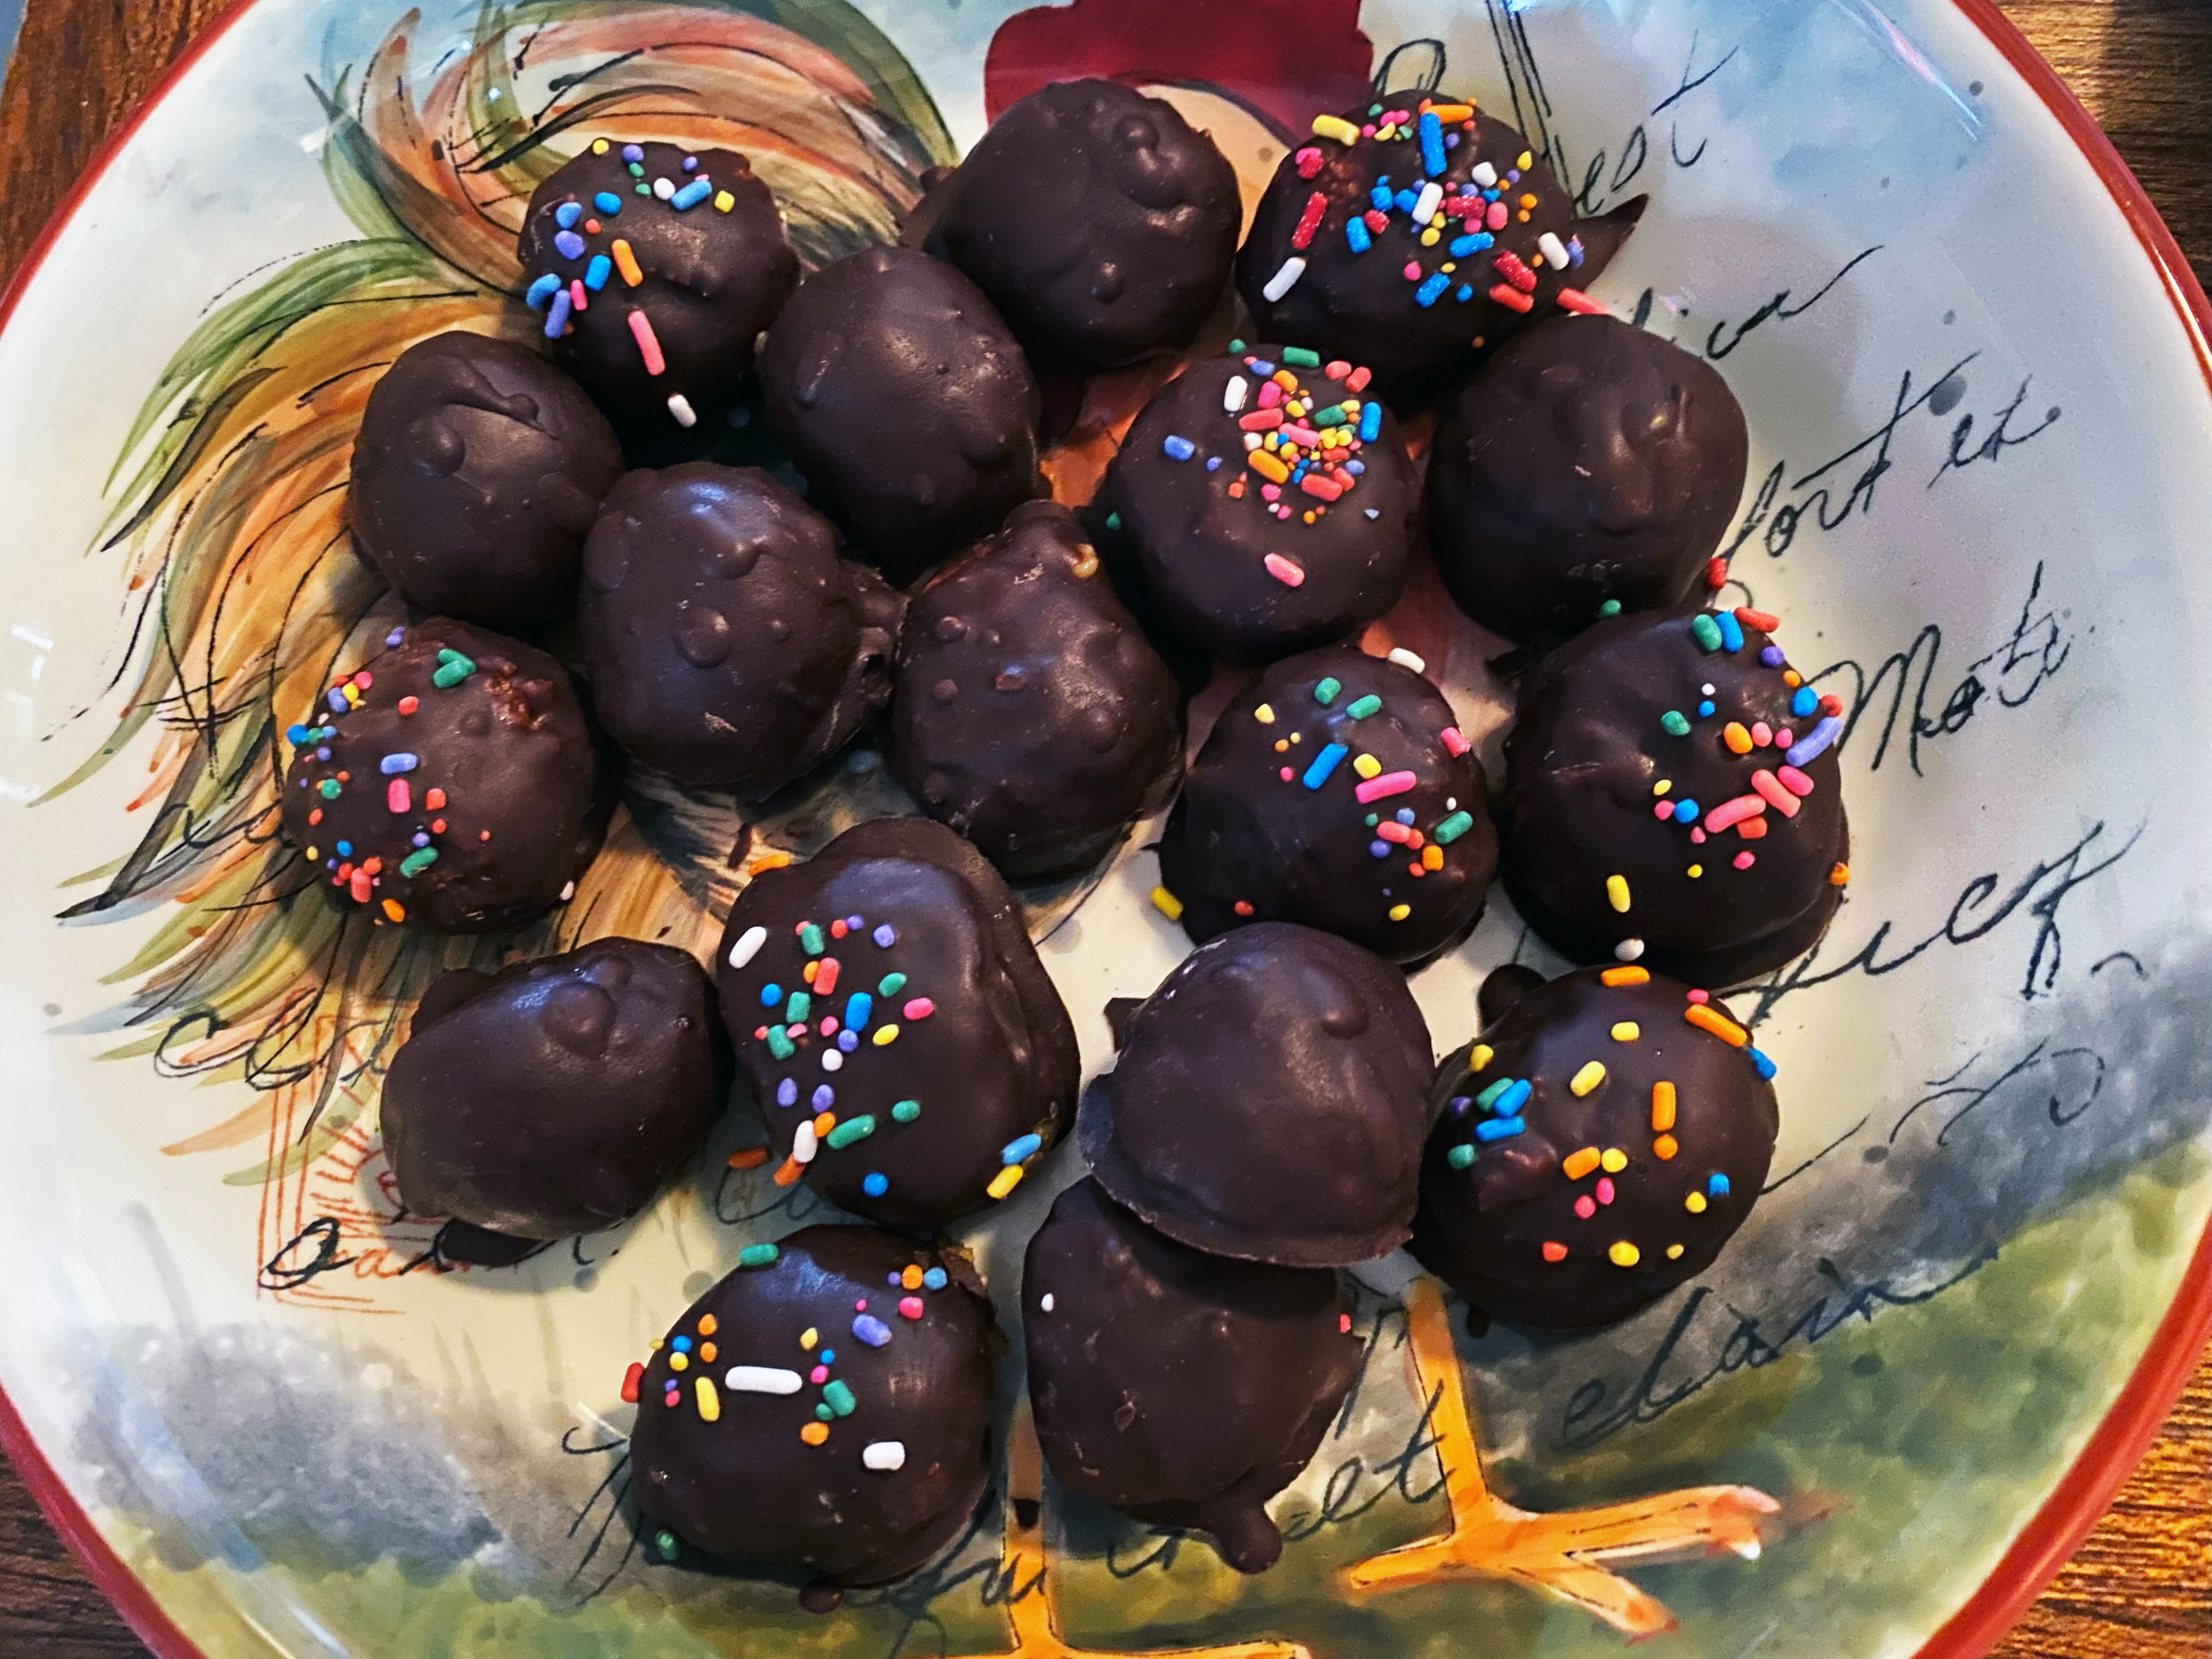
Making Chocolate Peanut Honey Bites
Three ingredients and a little preparation yield these simple to make disappearing bites. Chop the peanuts to a sandy texture and mix with honey. Coat in chocolate and sprinkle with sprinkles for a satisfying treat that once you try them you will make them again and again.
1 2 3 Chocolate Peanut Honey Bites
Sweetened peanuts with a touch of honey, enrobed in dark chocolate, these bites are easy to make and even better to devour. You have been warned.
Yields 30 Pieces.
Recipe
Ingredients
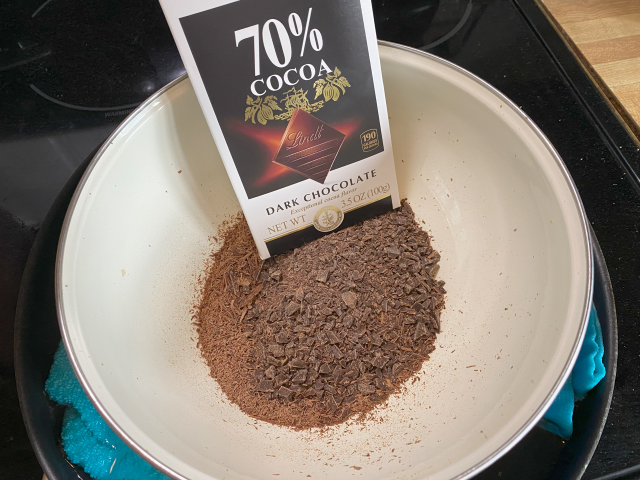
100 grams dark chocolate, chopped and prepared as directed
200 grams honey
300 grams salted peanuts
Directions
PREP THE FILLING
Pulse the peanuts in a food processor or coffee grinder until they resemble coarse sand.
– You could also chop the nuts up with a knife on a cutting board.
Place the chopped nuts into a large bowl and pour the honey over. Using clean hands, mix the honey in until it is completely incorporated. Take the bowl and and place it in the refrigerator to chill for 20 minutes.
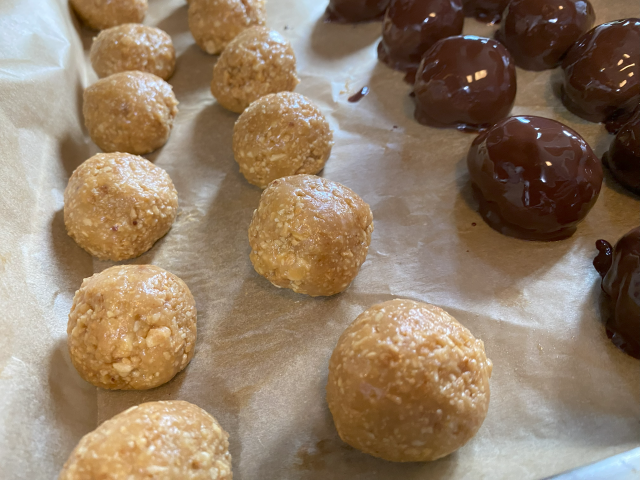
After 20 minutes, take the filling out of the refrigerator and divide it into 1 teaspoon sized balls placed on a rimmed baking sheet lined with wax paper (or parchment paper). Return them to the refrigerator to keep them cold while you prepare the chocolate.
PREP THE CHOCOLATE – Simple method
Chop the chocolate into small pieces and place it into a microwave safe bowl.
Microwave for 30 seconds on low power. Pull from the microwave and stir in the chocolate that has yet to melt. If it is not fully melted, return it to the microwave and repeat the process in 10 to 15 second bursts until the chocolate is smooth.
It is really easy to burn or scorch microwaved chocolate. It is important to only microwave it long enough for it to just start to melt. If you wait until the chocolate looks completely melted on the outside, it’ll be scorched and taste burnt
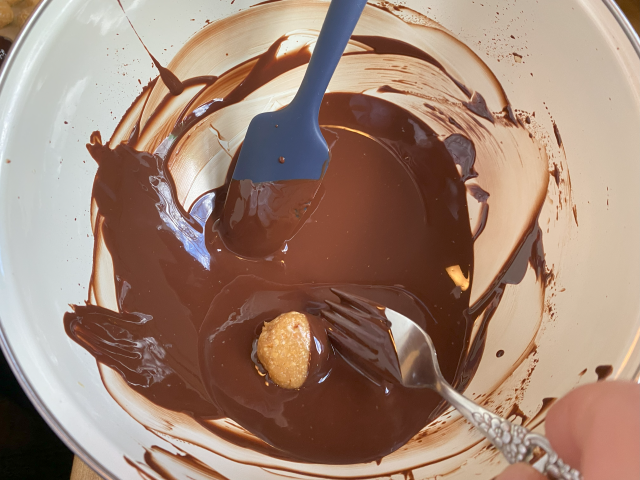
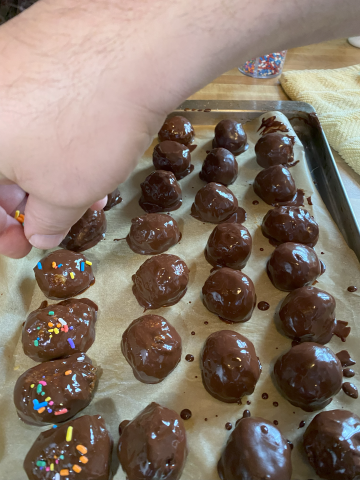
DIP THE BITES
Drop the bites into the chocolate and stir them to coat with a fork. Pick them up from the chocolate and allow excess chocolate to drain off. Move to the wax sheet and continue for the remaining bites.
DECORATE
While the chocolate is still soft, you can optionally decorate with sprinkles
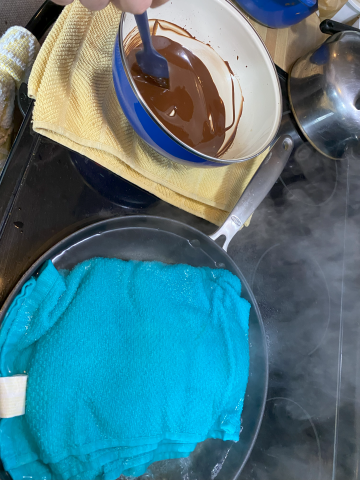
TEMPERING CHOCOLATE – detailed method
A candymakers variation of handling the chocolate
If you want to go a step further, you can handle the chocolate differently to yield a hard, crisp, shiny coating for the bites; something similar to a candymakers coating. It seems fussy but in practice just requires you to follow a process that handles the temperature for the chocolate as you melt is so it cools and forms the texture and shiny coating that you desire. This process was provided by Alton Brown following this process > How (and Why) to Temper Chocolate – Alton Brown
Place a kitchen towel in a large skillet and add enough water to cover by one inch. Put this over medium high heat and bring to a simmer. Place a second folded kitchen towel on the counter nearby and secure a wooden spoon to stir the chocolate as it melts. (see the photos below)
Take the chopped chocolate and place it in a metal bowl. Set the bowl in the skillet and hold it for 5 seconds. After five seconds take it out of the water and place it on the folded towel. Stir the chocolate for 30 seconds.
After thirty seconds, return the bowl to the water and heat it again for 5 seconds. Then repeat the 30 second stir. While you are doing this measure the temperature of the chocolate – looking to bring it to 91°F
When you the chocolate melted and at temperature, retrieve the bites from the refrigerator and dip each one to full coat, returning them to the wax paper to cool
– If the chocolate drops in temperature and begins to thicken, set it back in the skillet to bring it back to temperature.
Tips
- It is best to forgo using chocolate chips for this. Chocolate chips have additives that will not work with the tempering process.
- Be sure to keep the peanut bites cold. If the temperature of the room you are working in is warm, the filling can become soft, sticky, and hard to work with.
- For ease of melting, take the time to chop the chocolate into small, consistent sized chunks.